Tutorials:14 Wetlands
From Gsshawiki
This tutorial is compatible with:
- WMS Version 8.2 and later
- GSSHA™ Version 4.0 and later
Disclaimer: GSSHA tutorial exercises do not represent real world conditions
Contents
[hide]Run the Base Model
If you are starting at this tutorial:
- In the 2D Grid Module
 select GSSHA™ | Open Project File.
 - Browse to the Judy's_Branch_tutorial\Finished_tutorial\streams_xsec directory and open the file named streams_xsec.prj.
- In the 2D Grid Module
 select GSSHA™ | Save Project File.
 - Save the file as NoWetlands.prj
- Select GSSHA™ | Run GSSHA™
- When GSSHA™ finishes running, make sure the option to Read the solution is toggled on and click Close
- With the Select Hydrograph tool
 selected, double click on the hydrograph icon near the outlet
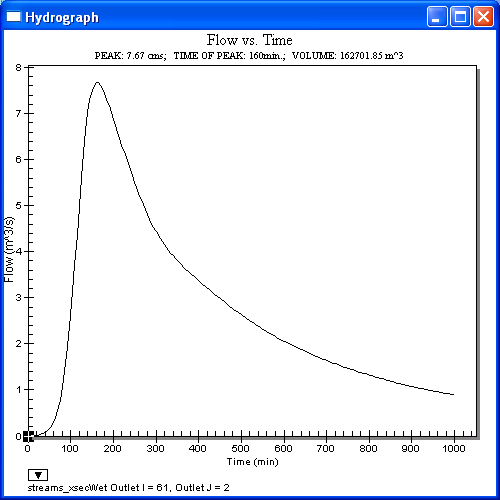
 - The runoff hydrograph should look similar to Figure 40.
Adding Wetlands
- Make sure the GSSHA™ coverage is the active coverage in the Project Explorer
- Choose the Create Feature Arc tool

- Using the Create Feature Arc tool
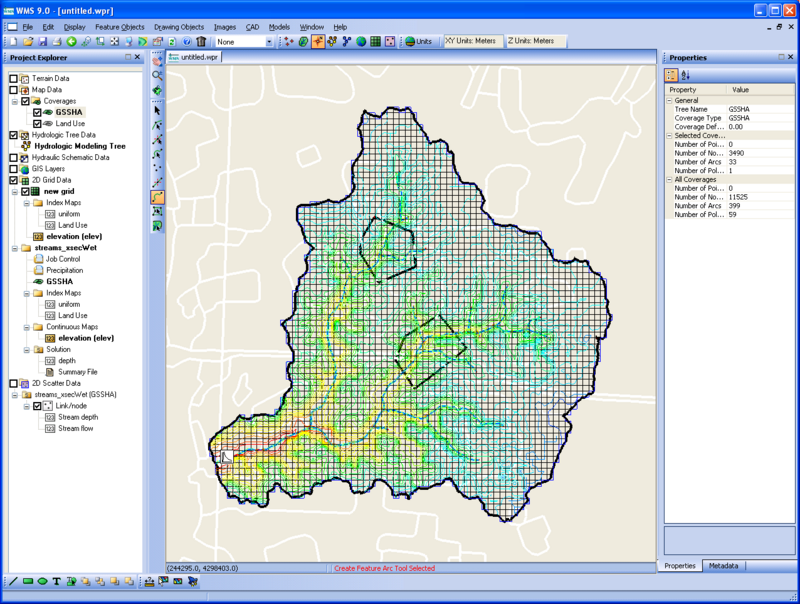
 , create two wetland polygons in the upstream portion of the watershed similar to those shown in Figure 41.
 - Choose the Select Feature Arc tool

- Hold down the shift key and select the two wetland polygons you just created
- Select Feature Objects | Build Polygons
- Choose the Select Feature Polygons tool

- Double click on one of the wetland polygons
- Change the Polygon type to Wetland
- Enter an Initial storage depth of 0.0 mm, a Retention depth of 1000 mm, a Retention depth hydraulic conductivity of 1 m/day, a Vegetation height of 500 mm, a Vegetation height hydraulic conductivity of 10 m/day, and an Inundated Manning's n-value of 0.1.
- Click OK to close the GSSHA™ Polygon Attributes dialog
- Repeat for the other wetland polygon
Save and Run the Wetlands Model
- In the 2D Grid Module
 select GSSHA™ | Save Project File.
 - Save the file as Wetlands.prj
- Select GSSHA™ | Run GSSHA™.
- When GSSHA™ is done running, make sure the option to Read solution on exit is toggled on and click Close.
- With the Select Hydrograph tool
 selected, double click on the hydrograph icon near the watershed outlet.
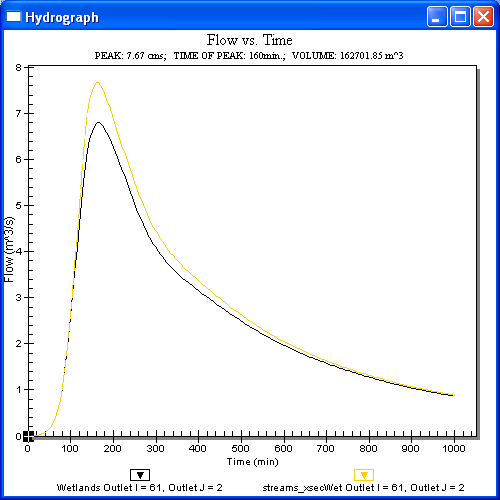
 - Notice the lower peak flow when wetlands are added. Your hydrograph should look similar to Figure 42.
This concludes the GSSHA™ wetlands tutorial.
GSSHA Tutorials
GSSHA Tutorial Download Website


